Tuesday, April 26, 2011

Side dish in the springtime - Balsamic honey glazed vegetables

So though the blog makes it seem otherwise, there are few things in the kitchen (or deck) that Drew handles and with our first beautiful spring day (finally) it was time to grill us our first steaks here in Cherry Hill.

Drew handles all the grilling in our house, so I decided to make an equally delicious side dish of roasted potatoes and carrots in a balsamic honey glaze.  It takes a few additional steps but this is a great way to jazz up standard vegetables that make the perfect thing to star along side a steak, pork chops or chicken.
BEFORE
This works for most veggies but I had carrots & fingerling potatoes on hand in my kitchen so I started with those adding some basic flavors and roasting in the oven.

AFTER
You can see the sticky glaze I achieved on the vegetables here.  They were so tasty, Drew finished them before he was done with his steak.
Use this recipe to jazz up your next steak dinner:

Balsamic-honey glazed vegetables
Ingredients:
  • 2 pounds of vegetables cut to roughly the same size (carrots, parsnips, potatoes, yams all work)
  • 6 tbls olive oil (I used a smoked olive oil)
  • 1 sprig of rosemary finely chopped
  • Sea salt
  • Fresh group pepper
  • 1 1/2 tbls butter
  • 1 1/2 tbls honey
  • 2 tsp balsamic reduction*
*This is something I make in batches & keep on hand in the fridge and use for cooking and also salad dressings:
Put 1 cup of balsamic vinegar in a small sauce pan and cook on low heat until reduced down to 1/3 cup, stirring occasionally.
Instructions:
  1. Pre-heat oven to 400 degrees F
  2. Line a rimmed baking sheet (jelly-roll pan) with foil
  3. Place veggies on the lined baking sheet & coat with olive oil. Toss to cover all veggies
  4. Sprinkle liberally with salt, pepper & the rosemary. Toss to coat all veggies
  5. Roast veggies in the oven for 10 minutes, take out & stir
  6. Roast for another 10 minutes, take out & stir
  7. Roast again until veggies are tender & starting to get charred around the edges.
  8. Meanwhile, melt butter in a small saucepan over medium hear
  9. Stir in honey and balsamic reduction.
  10. Drizzle glaze over vegetables & serve.

Tuesday, April 19, 2011

Parmesan Crusted Chicken & dinner party guidelines

I read recently that there are general rules to follow with regard to serving food at a party based on the number of people attending.  The rules listed were as follows:
  • Less than 6 people - serve a plated meal, restaurant style with pre-portioned plates
  • 7-10 people - family style service, with large bowls of all items easy to pass around a single table
  • 11-25 people - buffet style service
  • more than 25 people - family style or buffet style service at several tables/areas in the house
Interesting right? Well, we happened to be having some friends over for dinner on Friday night - just 4 of us, so the perfect time to give the rules a try and serve a plated meal.  

My Parmesan crusted chicken got the job of helping make this happen.  This recipe is great and the cooking time is around 10 minutes, making it an easy plated meal to execute and complete while guests are in the house.
BEFORE
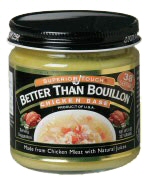
You can see this is a simple recipe from the basic ingredients.  I actually had everything on hand in my kitchen already, they are all general staples.  Note there are 2 types of cheese and also this new stuff I bought recently called "Better than bouillon" which is a jarred paste that can take the place of bouillon in any recipe.  So far, it has worked great and can be found in a number of flavors at most grocery stores.

AFTER
Here is the complete plated meal as it was served to all the guests.  It was easy to plate and kept the dirty dishes to a minimum.  Plated service means no serving bowls or serving utensils for the chicken or the pasta.

Once of the great things about this dish is that it tastes fried, but it actually cooks in the oven. Here is how you can make it at home:

Parmesan crusted chicken
Ingredients:
  • 5 tablespoons butter melted
  • 3 large eggs
  • 1 tbls "Better than boullion" (you can also use dijon mustard - 3 tbls)
  • 2 cups panko breadcrumbs (Japanese breadcrumbs - look in the asian food aisle in your grocery store)
  • 1 cup shredded parmesan cheese (note: this is SHREDDED not grated)
  • 1/2 cup shredded romano cheese
  • 1 1/2 tsp salt
  • 1 tsp ground pepper
  • 6 skinless, boneless chicken breast halves, butterflied
Instructions:
  1. Preheat oven to 500 degrees (yes you read that correctly 500 degrees)
  2. Spray a large rimmed baking sheet with non-stick spray (if you have butter flavored use that)
  3. Whisk eggs and "Better than boullion" (or dijon mustard) in a medium bowl
  4. Combine panko, parmesan, romano, salt & pepper in a large bowl (you can also add any other dry seasonings you want to this mixture)
  5. Dip chicken on piece at a time into the egg mixture and then into the panko mixture coating generously
  6. Place on the prepared baking sheet
  7. Drizzle melted butter over the chicken
  8. Bake chicken until browned about 10 min - flipping once at around the 6 min mark.
Serve over potatoes, vegetables or as I did with a rigatoni pasta covered in a simple 1/2 marinara & 1/2 Alfredo sauce.

Friday, April 15, 2011

A week away & a rainy day favorite

Well - this week we were away for business in Syracuse, NY where Spring has yet to make an appearance and there were many a dreary day during the 4 day trip.

Of course, there was no cooking at the hotel during the trip, but the weather had me thinking of my favorite rainy day dinner - my Tortellini Chowder.   This VERY quick & easy dish really hits the spot when it's a little cold out and you want a meal to feel warm and cozy.
BEFORE
You can tell by the photo that most of the meal consists of pre-packaged items. This serves the double purpose of making it an easy dish to prepare, while also allowing me to keep most of the items on-hand to be used at the drop of a hat.

The items I keep on-hand include frozen veggies & potatoes, chicken stock and refrigerated tortellini.  In addition milk & a nice smoked gouda cheese are needed to round out the ingredients.

AFTER
All of those ingredients come together to make a creamy, smoky yummy chowder that is so satisfying, Drew requests the meal at least once a month.

Make it for yourself on the next rainy day:
Ingredients:
  • 28 ounces chicken stock
  • 15 ounce package loose-pack frozen vegetables (broccoli, corn, carrots etc)
  • 9 ounce package of refrigerated cheese or meat filled tortellini
  • 2 cups milk
  • 1/4 cup of flour
  • 1 pack/box (9oz) Seasoned Roasted Potatoes with Garlic & Herbs - thawed in microwave
  • 1 tablespoon snipped fresh basil
  • 1 cup shredded smoked Gouda cheese plus a little extra to top off each bowl while serving. 
Preparation:
  1. In a large saucepan, combine broth and frozen vegetables and bring to a boil.
  2. Stir in tortellini and return to boil.
  3. Reduce heat and simmer uncovered, about 4 minutes or just until vegetables are tender.
  4. Meanwhile, in a small bowl combine 1 cup of milk with all the flour and whisk until combined. 
  5. Add milk/flour mixture and remaining 1 cup of milk to the broth. Add roasted potatoes.
  6. Cook and stir until thickened and bubble. Cook 1 minute more and then turn off heat.
  7. Add in cheese and fresh basil. 
  8. Stir until cheese melts.
  9. Season to taste with fresh ground pepper.

Friday, April 8, 2011

Fish and chips - Wednesday night dinner

Making the menu for this week at the house was pretty easy, we had plans over the weekend & are going out of town on Monday, so a small menu of just 2 meals was needed to fill in the blanks.

I was torn between a few things, but after seeing the fresh tilapia available at the supermarket - fish & chips jumped to the top of the list.

BEFORE
You can see the amazingly fresh fish, my sliced potatoes (these are yellow butter potatoes), flour for dredging and the simple batter made with flour, eggs and various seasonings.

AFTER
Drew LOVED the fish and made a point to mention that the "perfect bite of fish, potato & the remoulade was the best fish I have ever made for him".

So you want to make this recipe too?  It is quite easy to do:

Fish
  • 4 pieces of tilapia cut in half lengthwise
  • Vegetable oil
  • 1/4 cup flour for dredging
  • Fish fry batter:
    • 1/2 cup flour
    • 2 eggs
    • Seasoning - I use whatever is on hand, for this meal, I used seasoned salt, garlic powder, garlic pepper, onion powder and some extra sea salt as well.
Chips
  • 4 medium potatoes sliced - you can go thick or thin with the cut, just make sure they are uniform so they cook evenly
  • Seasoning - I used the same seasonings that I put in the batter.  It made for a very consistent flavor to the whole meal.
Remoulade 
  • I don't measure for this and really it's just a fancy way of saying flavored mayo.  So just put some mayo in a small bowl and add whatever you think will taste good.  
  • I put a little heat with a pinch of cayenne pepper along with the same garlic & onion flavors I used for the fish & chips.  
  • Also added was a little bit of smoked olive oil, which gave it just a little hint of something difference.
Directions:
  1. Mix the batter ingredients together with a whisk.
  2. Fill a skilled 1/2 way with oil and heat it up.
  3. Turn on your oven to 350 degrees which will hold the fish and keep it warm while the chips are being cooked
  4. Once the oil is hot - time to get the fish going.  Dip each piece in the the dregding flour and then into the batter. Place into the hot oil and fry until golden brown. My large skillet held 3 pieces of fish at a time.  
  5. When they are all fried put them in an oven safe container & place in the oven.
  6. Time to pop those potatoes into the oil - go gently as there will be a little bubbling as the potatoes hit the oil. 
  7. Cook to desired doneness - I like mine crispy on the edges but not too crunchy.
  8. Sprinkle with salt & any other seasonings you like.Serve with the fish and a side of the remoulade.